Splicing A Loop At End Of Rope
Dick Atlee
Latest revision: 26 October 2015
Printable PDF
(Back to
Ropework <
Crafts <
Home
|
I learned to splice rope from Fred Lord, a cousin-in-law and lobsterman still fishing at 86. Fred was very patient as each time I'd visit him and learn how to do it, only to return home and get stuck at the third step. Time after time. Finally I took some rough pictures, and finally was able to document it well enough that I can now do it successfully. However, this description is of how I do it -- Fred would probably laugh at the details and think they were anal-retentive (he'd never use the term). He just does it.
The rope consists of three coiled strands. The splicing is done by weaving what I will call the three "weaving strands" -- at the end of the rope -- into a section of "rope strands" further back on the rope. The three strands are woven into the rope once, and then a second time -- ROUNDS 1 and 2 below. |
EQUIPMENT NEEDED
 |
|
PREPARING THE ROPE

|
|


Step 1. Getting Started
|
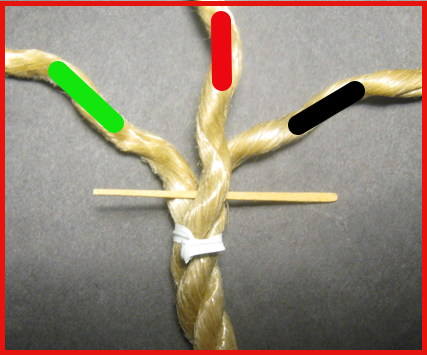
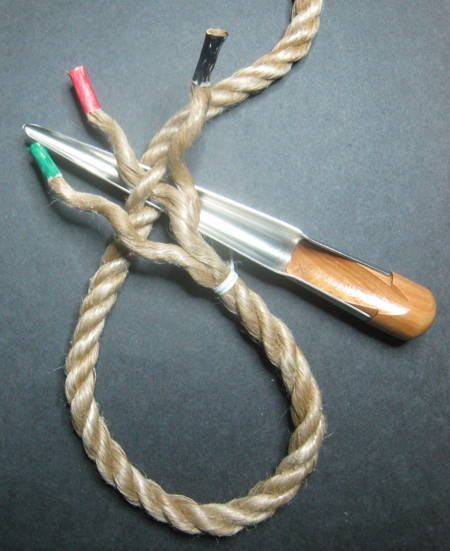
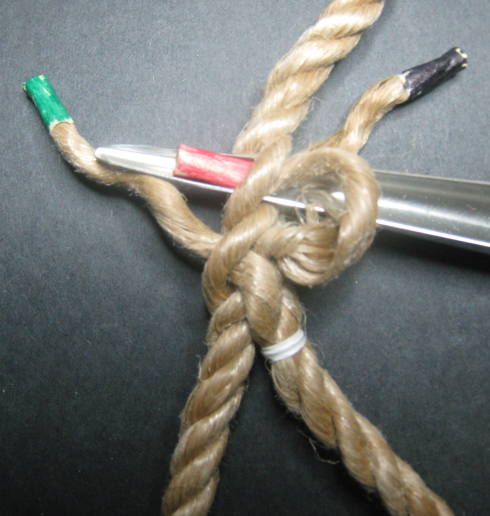
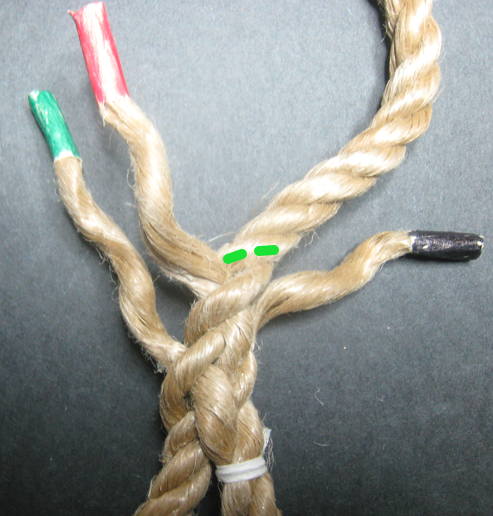
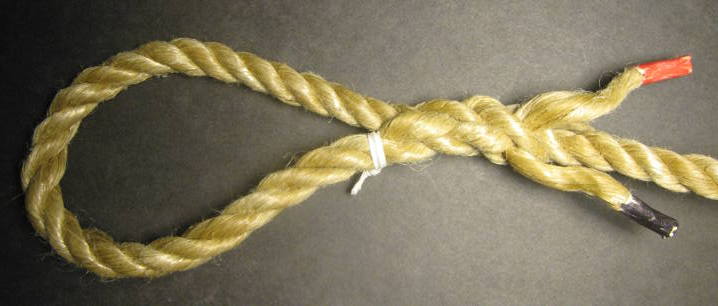
When you start, the position of the strands should be (using this particular method): RED strand should be in the middle on top of the rope, GREEN on the left, and BLACK on the right (the tape in the picture is just to pose the rope for photographing). A close-up is shown at the right (the toothpick is just to emphasize that the RED is on top).
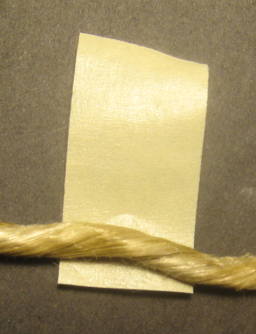
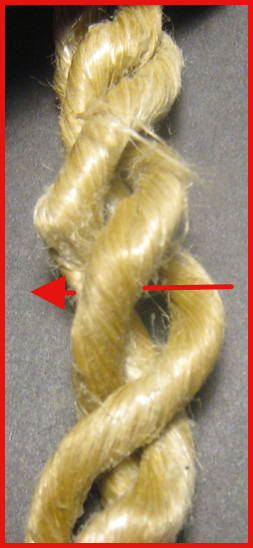
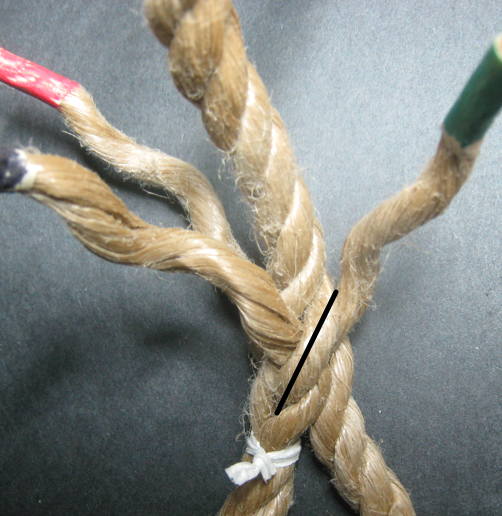
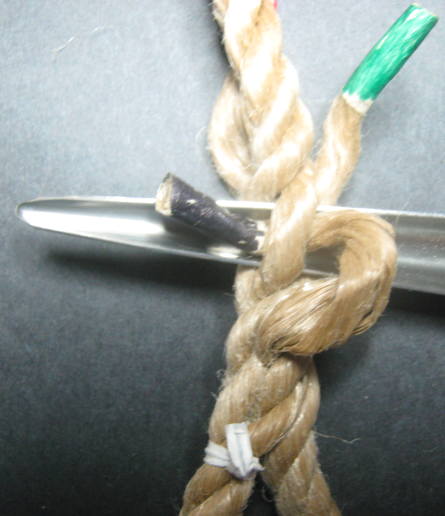
The loop you are about to make should start with the ends on the right, and the rope into which it is to be spliced on the left. This is not trivial -- until I realized that this was important, I found it impossible to make Fred's instructions work. The first step will involve opening the rope as shown at the left. This is holding the rope on either side of the desired splice starting point and twisting the lower hand to the right and the upper hand to the left. The arrow shows where the hollow fid will be inserted to force the strands apart and provide a channel for the active splicing strand to pass through. (Note: If you've chosen rope that strongly resists this, you will not have a fun time with this process.) |

Step 2. First RED
|
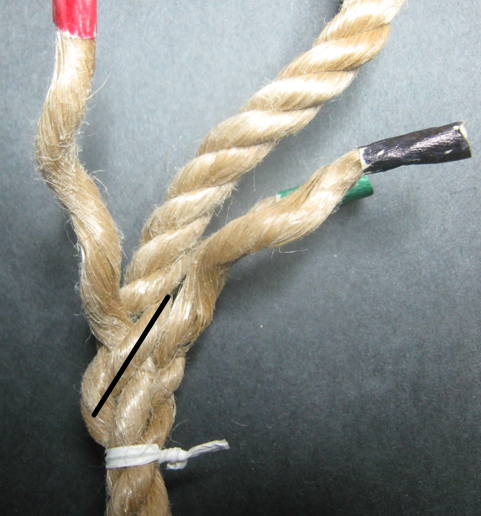
With the hollow fid pushed through the rope in the previous step, feed the RED strand through it, remove the fid, and pull the strand snug against the rope it's just gone through. |
Step 3. First GREEN
|
||||
|
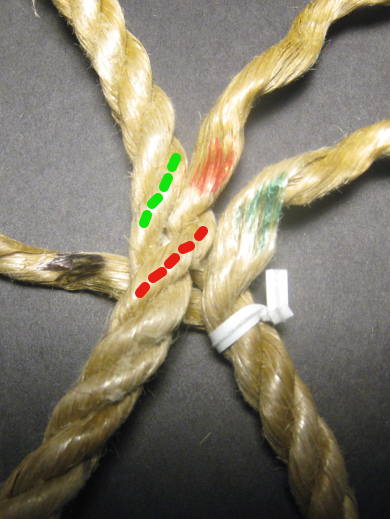
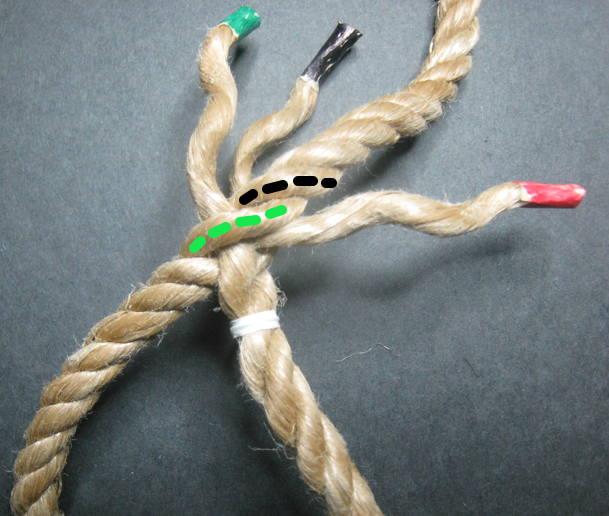
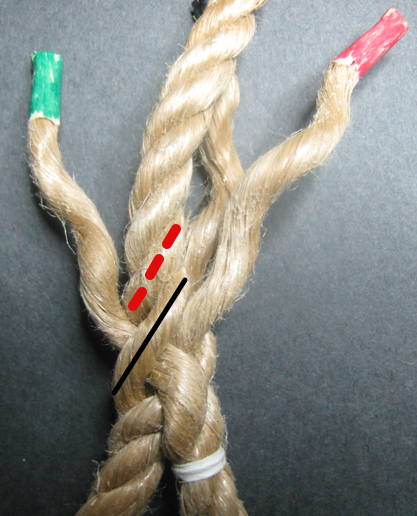
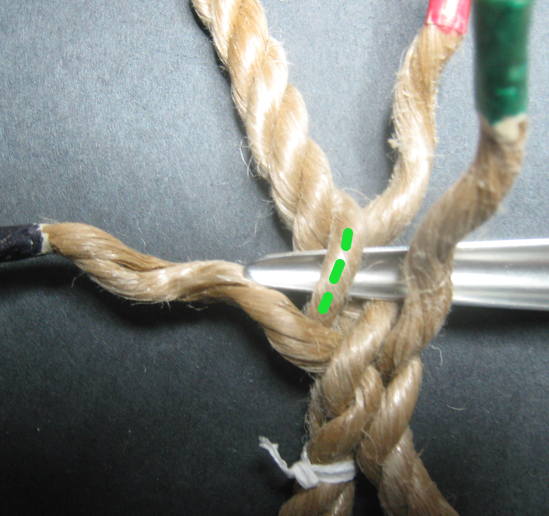
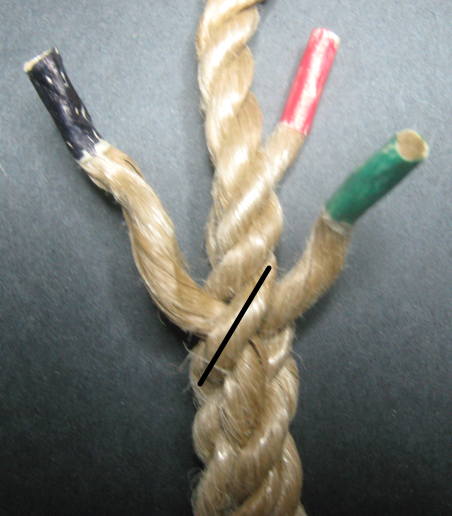
Fred's primary rule is that you always go under the rope strand that is above the one your previous weaving strand went under. At left, the rope strand that RED went under is indicated by a RED dashed line, so the GREEN one will be going under the rope strand indicated by the GREEN dashed line. The fid is pushed under that far enough to make a big enough hole to shove the weaving strand through. Once that is done, the fid is withddrawn and the GREEN strand is pulled in tight.
Per Fred's rule, the next rope strand to be gone under is the one above the one the GREEN one just used, indicated by a black dashed line.. But . . . |

Step 4. First BLACK
| ||||
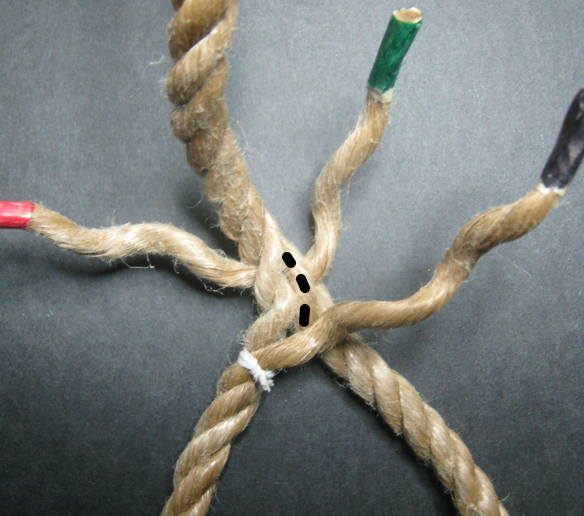
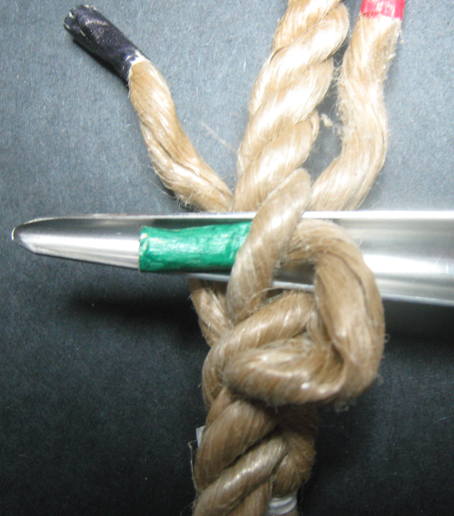
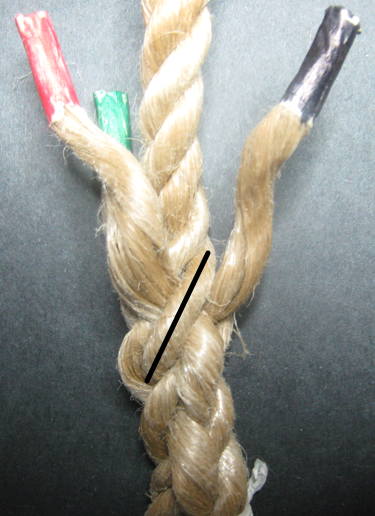
| This is the point where I always got stuck, until I learned the trick. You can't proceed directly. You have to flip the loop over. Believe it or not, the black-dashed rope strand shown here is the same rope strand that is black-dashed above in the previous step. The fid is pushed through, and the black weaving strand is run through it and pulled tight. |
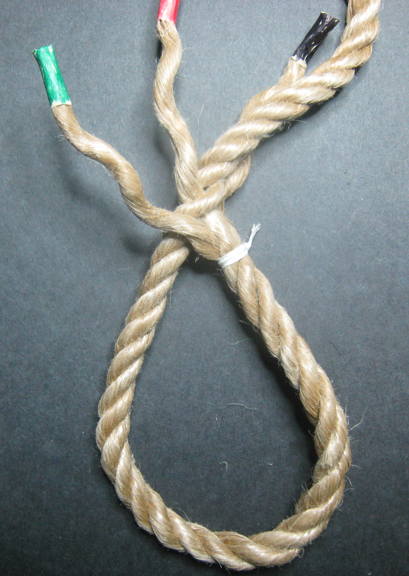
Step 5. Checking the First Round
|
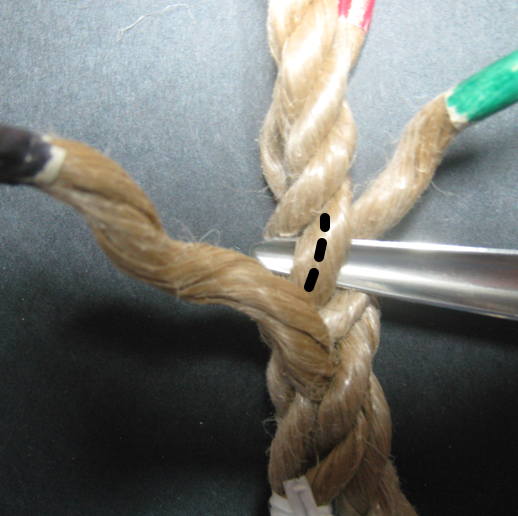
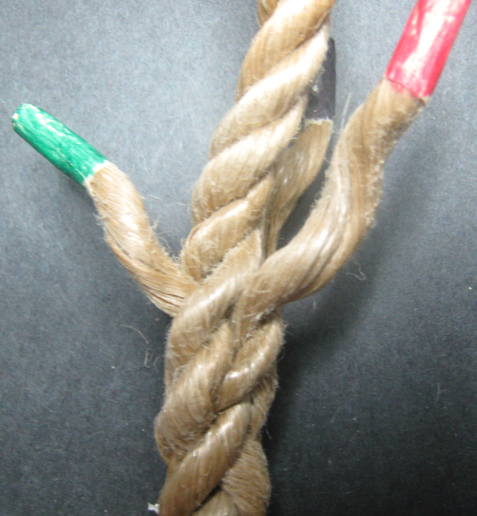
Fred's rule that you always go under the rope strand just above the rope strand you previously went under results in a good method for checking that you've done the three strands correctly. Between each weaving strand, there should be a rope strand. The pictures above show the three checks -- BLACK/GREEN, RED/BLACK, and GREEN/RED -- in which the rope strand between the weaving strands is marked with a thin black line. The last picture also shows the rope strand under which ROUND TWO's RED strand will go. For the check in this picture, the loop has been flipped back to its original position, and the second round of weaving will start in that position. |
Step 6: Second RED
|
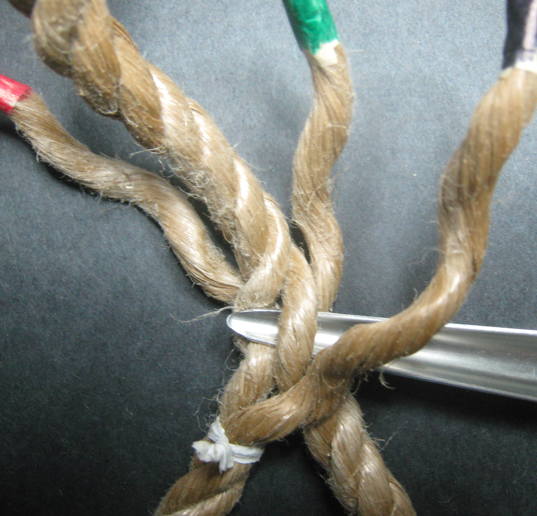
As in all previous cases, the fid is slid in under the rope strand dictated by Fred's rule (shown dashed RED in the last picture in Step 5), and the BLACK strand is pushed through and pulled tight. |
Step 7: Second GREEN
|
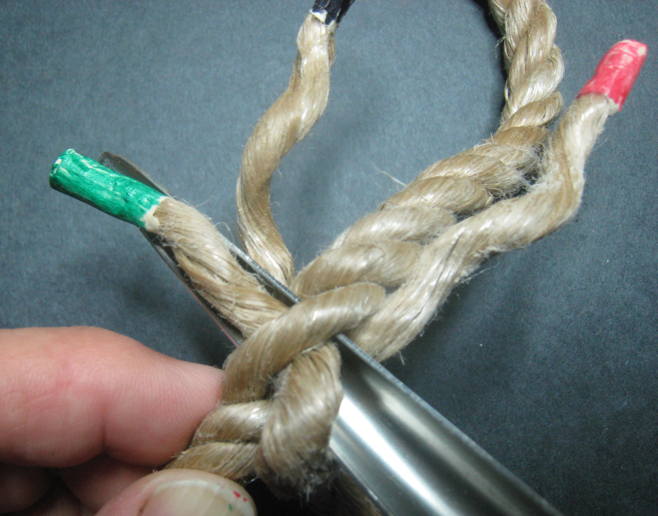
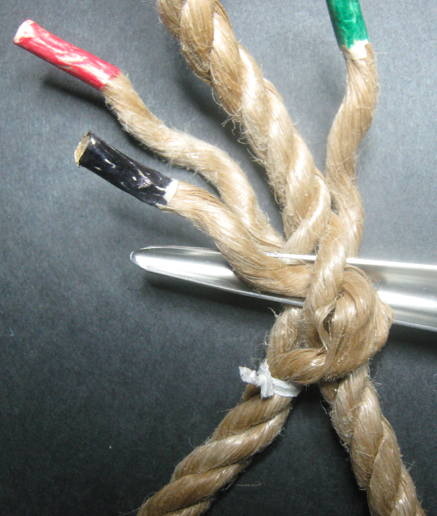
To get comfortably at the rope strand destined to take the next GREEN (marked with dashed GREEN in final picture in Step 6), the loop has to be flipped side-to-side again. Then the fid is pushed under the rope strand just above the one under which the BLACK went in Step 4, and the GREEN strand is pushed through and pulled tight. The last picture shows the rope strand under which the BLACK will be going. |

Step 8: Second BLACK
|
As in all previous cases, the fid is slid in under the rope strand dictated by Fred's rule, and the BLACK strand is pushed through and pulled tight. |
Step 9. Checking the Second Round
|
Again, we check to make sure that the three weaving strands each as a rope strand separating it from its neighbors. |
LOOP COMPLETED
|
|
| This completes the spliced loop, because Fred asserts that two rounds is quite sufficient to hold any load. The greater the tension applied, the tighter the splice gets. |
Updates
None at this time