 |
Nature Weaving A project done by second graders -- but wonderful for anyone . . . |
 |
Nature Weaving A project done by second graders -- but wonderful for anyone . . . |
| Disclaimer -- the photographs in this description were taken with a small digital camera in poor light [many years ago] by a person (me) inexperienced in such matters, resulting in somewhat blurry, oddly rainbow-hued images. As a result, they give only a sense of the technical aspects of the process and the resulting forms. The fascinating colors and three-dimensional aspects of the sampling of projects shown here do not come out at all. You'll simply have to try it yourself to get the real experience :-). |
| The idea |
| The loom |
| Stringing the loom |
| Gathering weeds and other items for weaving |
| Weaving |
| Samples of second-grade weaving |
The Idea
(back to contents)
This is the fifth autumn in which a second grade class in Virginia will be letting their creative urges run free among the weeds that live near their school and homes. If weeds are defined as plants-where-they-aren't-wanted, these weeds are transformed into something else, as the kids put them just where they want them, weaving them in and out among strands of coarse string on a simple loom made of plywood and screw-eyes.
The idea came originally from Cricket Magazine (regrettably I can no longer find the article and can't provide a citation -- if anyone spots it, please let me know). My only addition to it was the design of simple, inexpensive, not overly-complicated loom for the purpose.
The Loom
(back to contents)
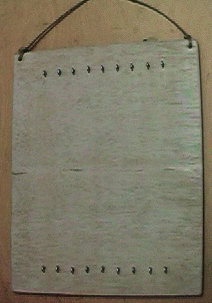
The loom looks like this (front and back)
 |  |
This particular design has held up well. It will be described here in detail -- but only as a starting point. I will note why I built it this way, but obviously there are many ways to approach this.
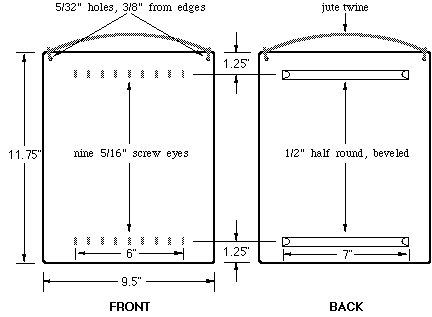
The loom is made of plywood -- preferably quite thin, to cut down on weight. It is stained (and/or varnished), both for aesthetics and protection from stains. There are two rows of screw-eyes for stringing the "warp" -- jute twine -- through which the weeds will be woven. However, the plywood is too thin for screw-eyes that can resist the strain from the weaving, so an extra piece of wood is mounted on the back of the loom, behind each row of screw-eyes, as an anchor for them. Half-round moulding (bevelled on the ends) was used for this, simply to reduce edges that might catch on things.
These materials are all available at most building supply stores:
| Materials | for each loom |
|---|---|
| 3-ply 3/16" plywood -- clear, unwarped (that's the hard part :-) |
7.5" x 11.75" |
| 1/2" half-round molding | two 7" lengths |
| small screw-eyes (I used 3/16" inside diameter) |
eighteen |
| Wood stain (I used "driftwood") | 2 coats |
| Jute twine | about 9.5 feet |
The plywood -- A 2'x4' piece of plywood will produce 12 looms if you cut them in a 2-by-6 array:

This leaves enough room for saw widths. I did all this with a hand saw, cutting the long way to get two 6-loom pieces (heavy line above), putting them on top of each other and cutting the resulting stack in half (i.e., into 3-loom pieces -- heavy dashed line above), and then stacking these on top of each other and making the final cuts in this whole stack to make the 12 looms. I then used a surfoam plane (a marvellous, inexpensive tool, well worth having!), a file, and sandpaper to round the corners and smooth the edges and faces.
The finish -- I had a hard time choosing whether to leave the wood unstained (just varnish), or stain it brown or gray. I ended up choosing a driftwood gray, which I rubbed in with a rag, allowing a bit of the natural color to show through. In retrospect, I think this was a lucky choice -- it seems to go well with anything the kids have woven on it. (If you use varnish, I'd stronly recommend a semi-gloss, and rub off any apparent gloss with steel wool or Scotchbrite.)
The molding -- After the loom was varnished, the half-round molding was glued on the back with Elmer's glue. I beveled the ends first -- it looks nice, catches on things less, and is very quick and easy with a surfoam plane -- a marvellous tool, indeed!
The screw-eyes -- You can use a fine drill for mounting them, but just the prick of an awl or nail is enough to start them. To get them in a nice even line and save time, you can make a mask out of shirt cardboard with nine holes punched into it, and nicks at the end to line up with a pencil line made on the face of the loom:

Screw them all the way in, until the rings start to dig into the wood.
The twine -- The twine we've used is 3-ply natural jute twine (Frank W. Winne & Sons, to be specific). It is rough -- once weaving elements are in place, they don't slide. It also tends to accumulate pieces of the weeds, so it generally isn't re-usable from year to year. Get a good supply. The loom hangar is an 18" length of twine tied into the loom's corner holes with a couple of half-hitches on each end (you can guarantee them by rubbing in a little Elmer's glue).
Here's the plan that describes this particular loom. Again, it's just one possibility. Alter it in any way you see fit:
Stringing The Loom
(back to contents)
This requires about 8 feet of jute twine. Tie one end of it onto the upper left screw- eye. I use a slip knot, but a couple of half-hitches would also do fine.
Use a bit of masking tape on the free end to make a sharp point that will go easily through screw eyes. Run the twine down to the bottom row and through the first two eyes. Then back up to the top row and through two eyes, and so on:
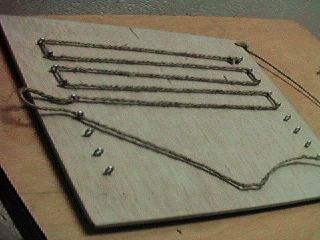
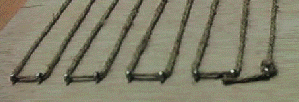
When you get to the last screw-eye at the lower right, before you tie it off, tighten up the twine throughout. The twine shouldn't be twangy tight, because the kids have to be able to weave all kinds of strange things through them, but they shouldn't be flaccid, either, or the woven items will slip or fall out. I would describe it as "comfortably tight, but not taught." Then tie off on the last eye with two half hitches, and run the remainder back through the eye to the left. Cut it off carefully. This illustration shows the excess length a bit too short -- after a season's use, it had pulled out of the second eye:
The resulting loom, ready for weaving, should look like this:

Gathering Weeds and Other Items for Weaving
(back to contents)
[This section was to be completed by the person who managed this aspect of the project, but that never happened. Even without that expertise, you can probably figure out ways to get kids into this.]
Weaving
(back to contents)
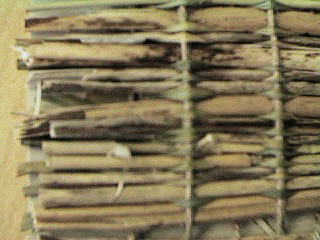
Here's a close up view of a particularly good job of weaving. The weaver here did a kind of double weave, using grass between each of the other items:
Samples of Second Graders' Weavings
(back to contents)
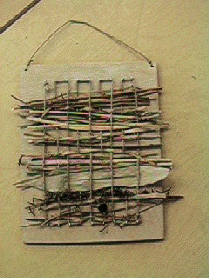
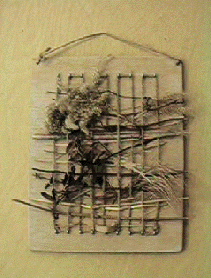
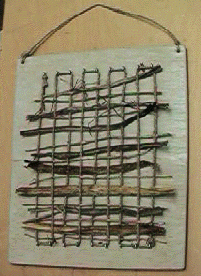
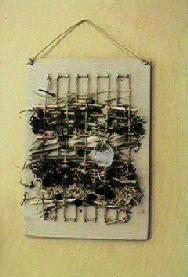
Again, remember that these images are way off in terms of clarity and color. But they give an interesting view of the contrasting approaches that can appear:
| Evenness | Chaos! |
|---|---|
 |
 |
| Sparseness | Density |
 |
 |
7 September 1997